

How To Clean Your Spray Tan Applicator
Every spray tan artist’s goal is to give each client the golden glow of their dreams. But even if you have the perfect tanning solution, client preparation, work area, and technique, there is one piece of the process that can be overlooked and cause problems: A clean applicator!
A clean applicator, free of build-up or residue from previous solutions is always going to give you the best opportunity to achieve the look you and your client are aiming for.
The good news is, cleaning your Fuji Spray Sunless applicator isn’t a hard or long process. You can do it yourself in about 10 minutes as part of your work routine!
Get Your Cleaning Kit Ready
Before you get started, we recommend getting your essential cleaning kit ready:
1) Cleaning solution
2) Warm water
3) Cleaning brush
4) Cloth or rag
5) Wrench tool provided with your applicator
6) Gloves
7) Lubrication oil
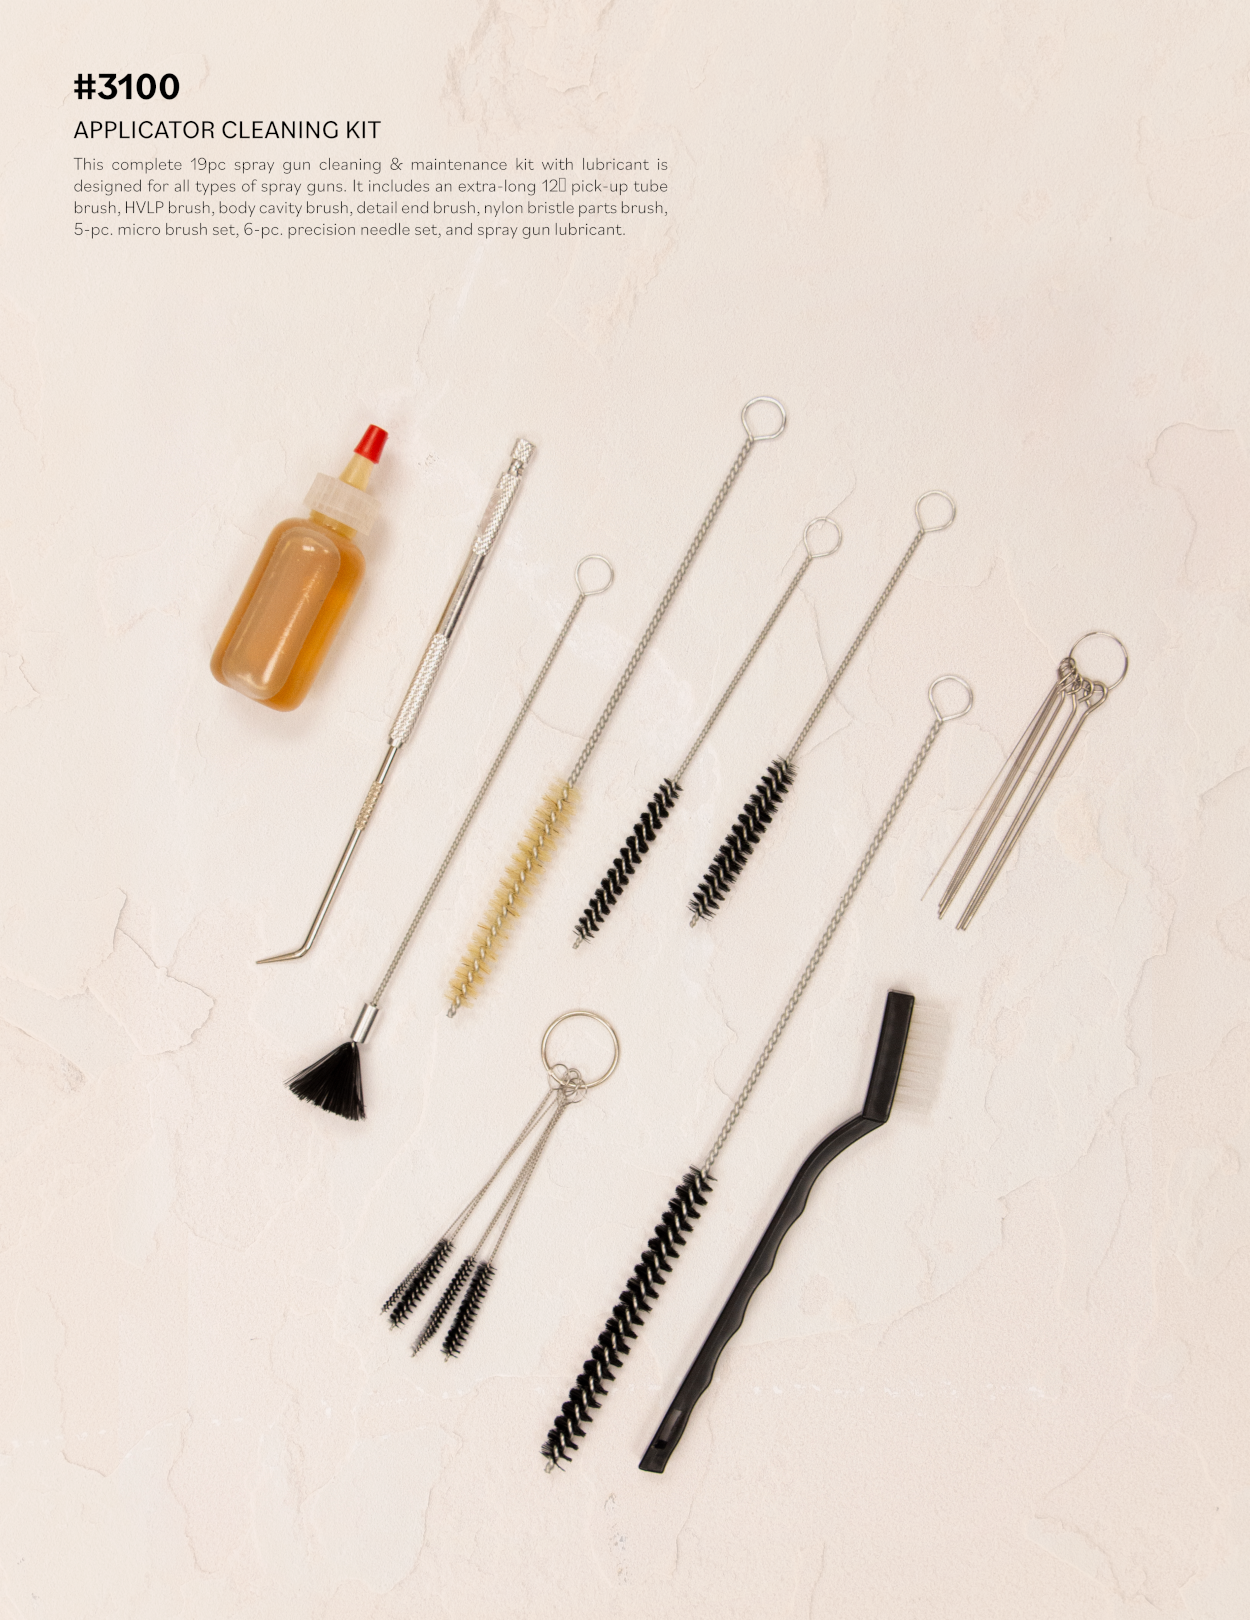
At Fuji Spray, we offer an incredible 19-piece cleaning kit that is available as an accessory. Click HERE to learn more about it and ask your nearest distributor today!
STEP 1: Empty Your Solution
a) Step one of your cleaning processes is to empty all solution from the applicator’s cup and wipe the inside with a damp rag.
b) Next, fill your cup with water and reattach it to the applicator. Hook your turbine back up to the applicator and spray into a bucket.
c) Repeat the water spraying process until your applicator sprays clean water.
d) Then, inspect the applicator’s pressure tube and air passages for any blockages. If tanning solution is in the pressure tube, clean it with warm water, or replace it.
TAN7350: Applicators made prior to 2016 have a small check valve in-line with your pressure tube. If tanning solution is in the check valve, we also recommend cleaning or replacing it.
T-PRO: Poke through the air passage on the lid of the cup to make sure air can pass through.
STEP 2: Disassemble Your Applicator
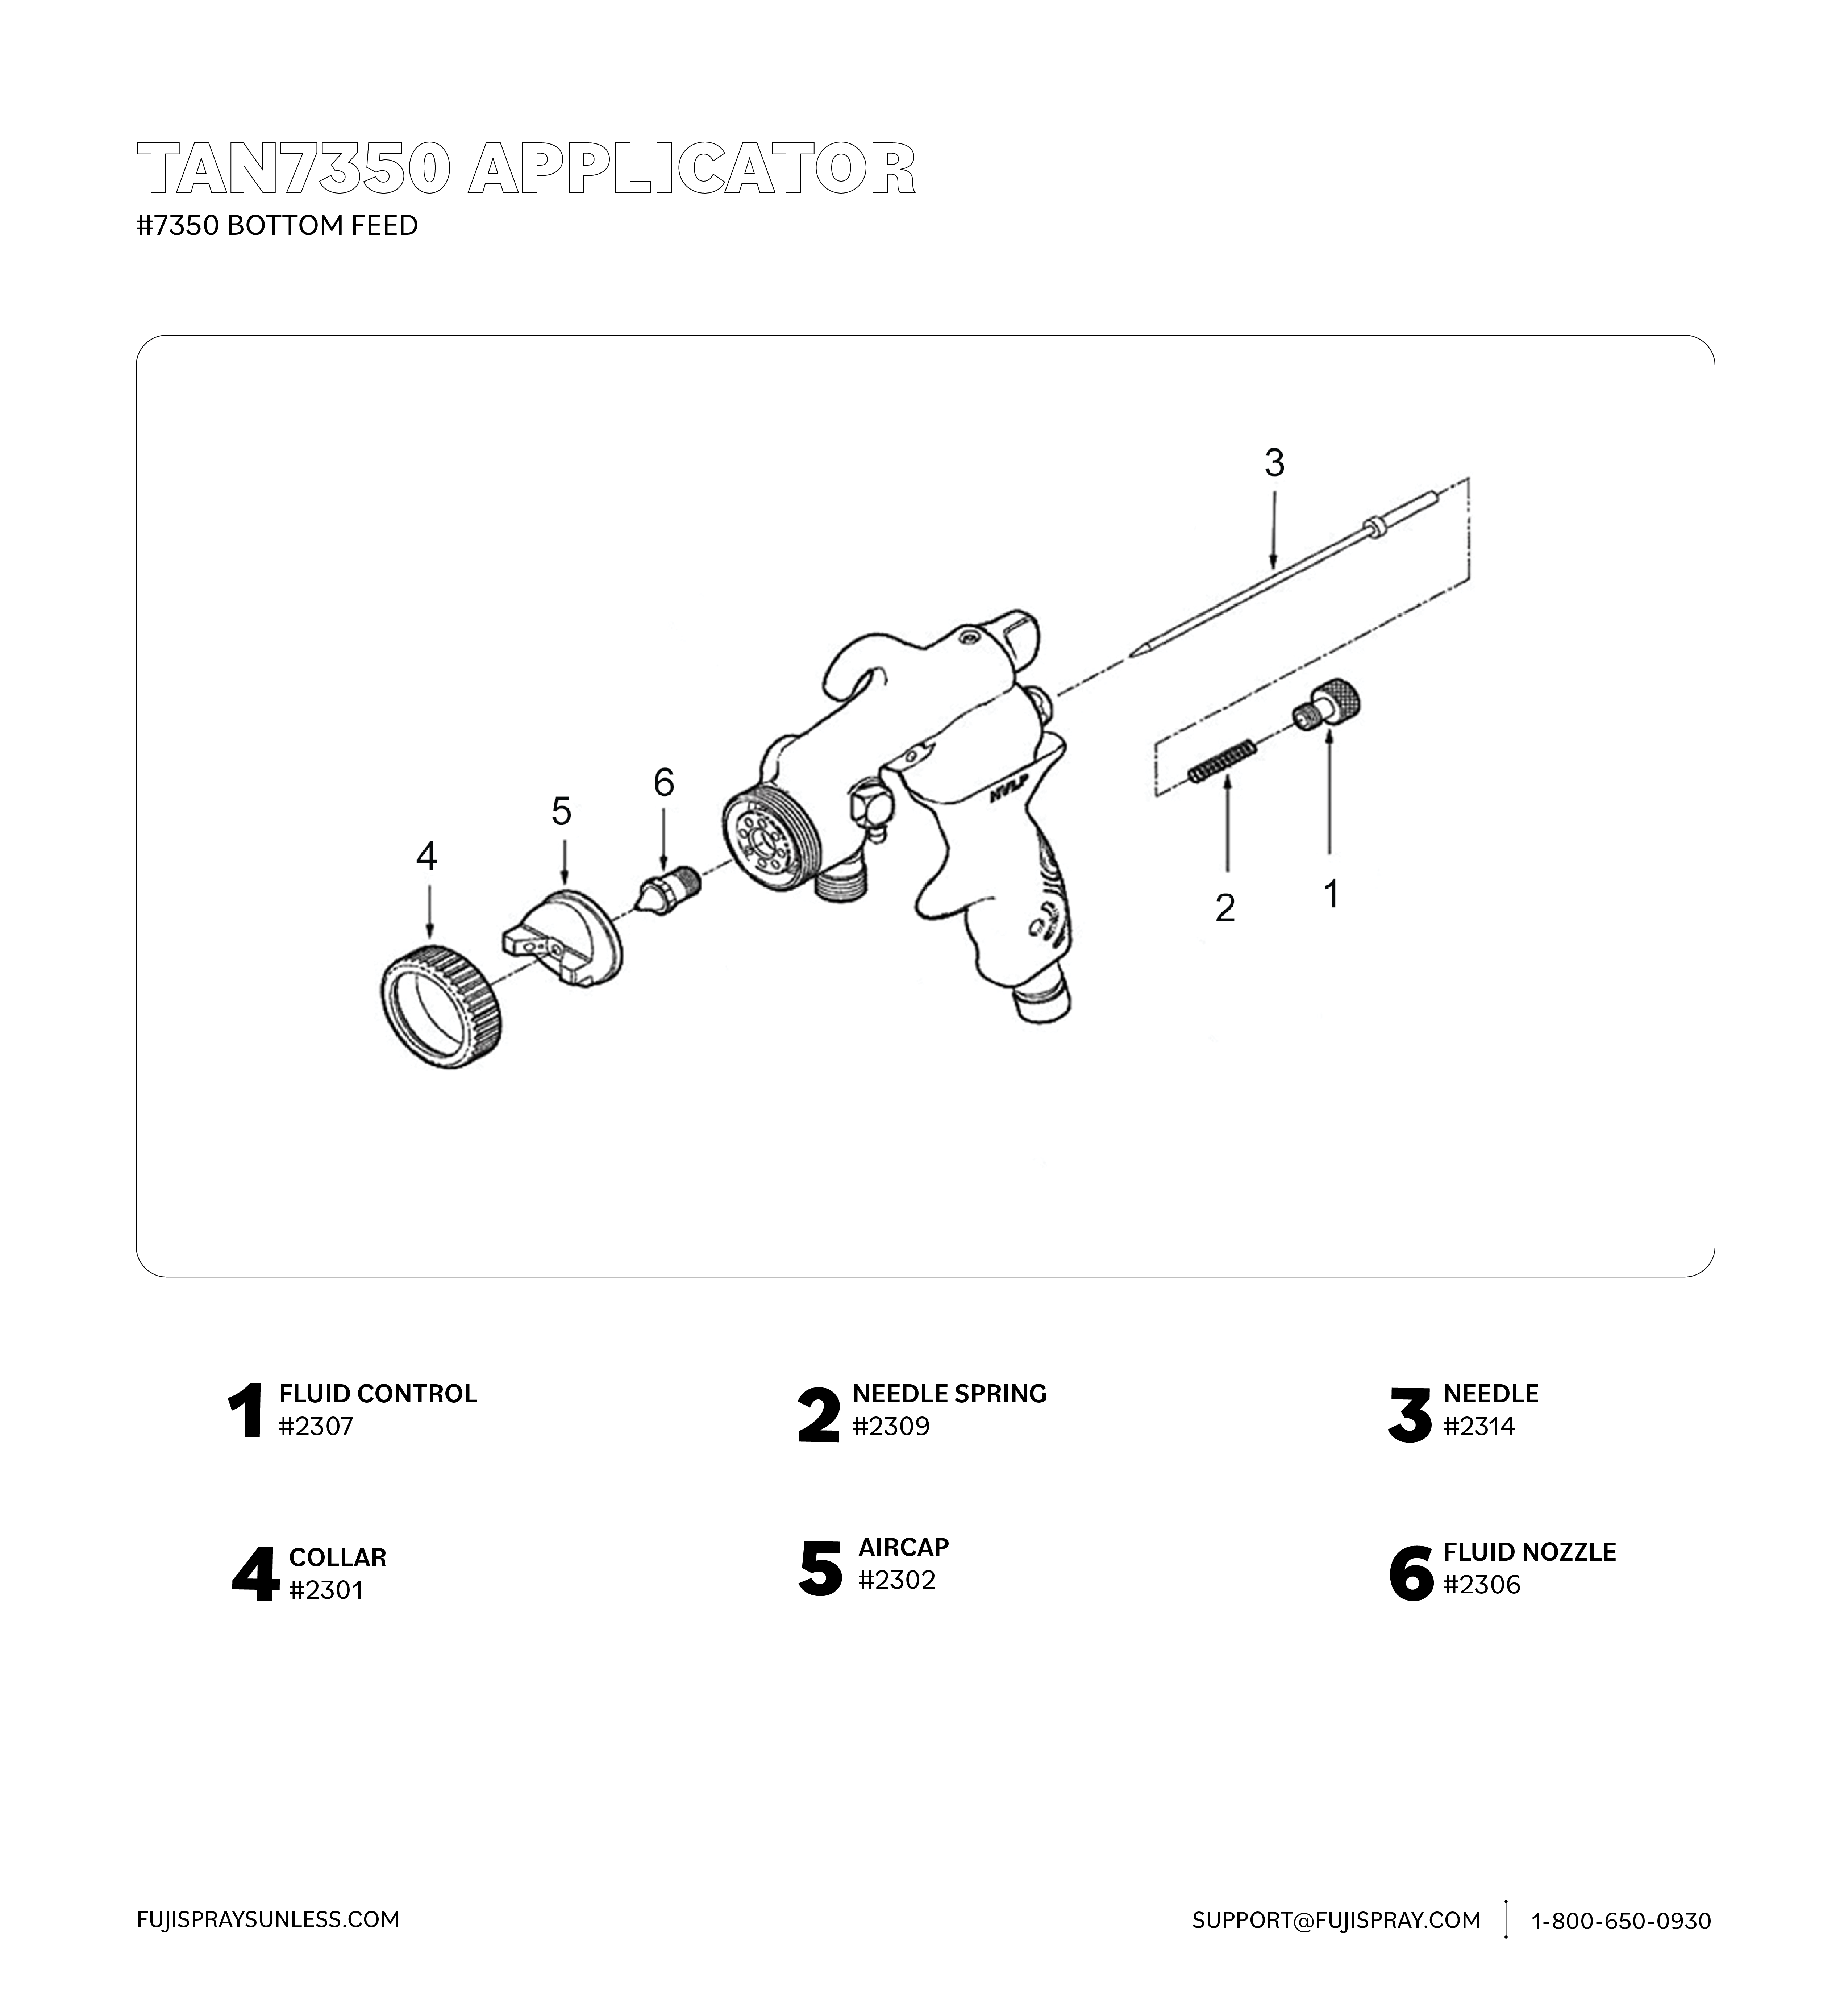
Now, we will start disassembling the applicator and cleaning the individual pieces. To keep your process orderly and safe, we recommend you removing the individual pieces in this order:
1) Fluid Control
2) Needle Spring
3) Needle (engage trigger before pulling out needle)
4) Collar
5) Air Cap
6) Fluid Nozzle
7) Air Diffuser (T-PRO Applicators)
8) Air Diffuser Seal (T-PRO Applicators)
9) Air Divider (T-PRO Applicators)

Using your applicator brush (dipped in cleaning solution mixture), clean the outside of your applicator and the openings exposed by disassembly.
When you have finished with your brush, wipe components dry with a clean towel.
Please note: It is best to use a towel free of any fibers that may come loose to prevent catching on applicator pieces or getting stuck in open crevices.
Repeat the brushing process to clean the rest of the disassembled parts that have been soaking in your cleaning solution mixture. Rinse with warm water and dry with your cloth when finished.

STEP 3: Reassemble Your Applicator
It is now time to assemble your applicator following these steps.
1) Install the air divider. When installing the air divider, make sure the small round hole is at the 12 o’clock position to match with the same size hole on the applicator body. (T-PRO only)
2) Install the diffuser seal and air diffuser. Make sure the locator pin is also located at the 12 o’clock position. (T-PRO only)
3) Install the fluid nozzle. Start by tightening the fluid nozzle by hand. When you can’t tighten it anymore by hand, use the wrench that came with your applicator to secure it in place.
4) Install the air cap and collar to the front of your applicator.
5) Install the needle. Lubricate the needle with gun lubricant or machine oil about 1.5” away from the needle tip. After lubricating, install the needle, the needle spring, and the fluid control.
6) Wipe the body of the applicator with a damp rag to complete your cleaning process.
Once you’ve finished cleaning and reassembling your applicator, you can make all the setting adjustments you’d like to get yourself ready for your next spray tan application. Like everything else, your cleaning process will become faster, easier, and unique to your own style as you do it.

