Setting Up Your Spray Patterns
Got your new applicator and not so sure how to set it up and adjust your spraying pattern? Here are some tips!
This blog will focus on spray pattern techniques and how to adjust your own spray gun settings for you to achieve the best spray tan results.
You can easily enhance your professional spray tanning results by adjusting your spray gun and following these steps: setting up your aircap, adjusting your fan pattern control knob and considering spraying distance/speed.
STEP 1: SET UP YOUR AIRCAP
The first step is to set your aircap set to the pattern of your liking or whichever spray pattern is more efficient for you.
The 4200 and 7350 applicators have three different patterns setting that you can choose from depending on your usage. Horizontal, vertical, and narrow for contouring.
To set your applicator to a specific spray pattern, rotate the aircap to the desired position and always make sure the collar is snug tight before spraying.
The illustration below displays all three spraying patterns available with your Fuji applicators:
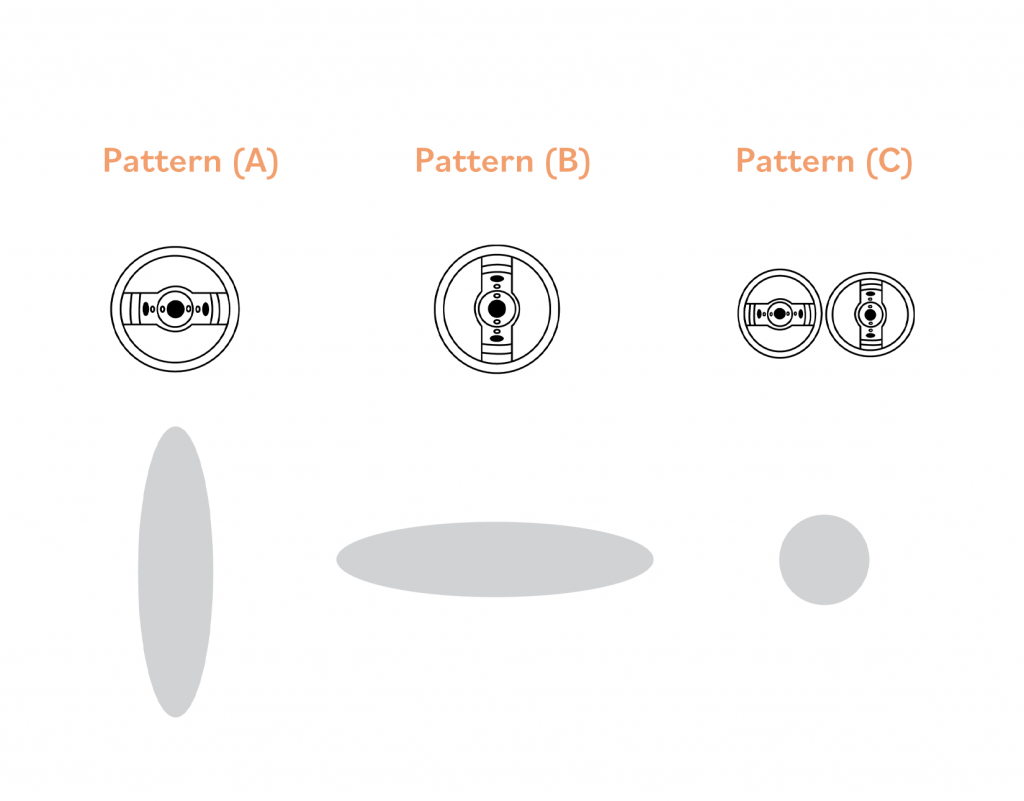
A) Pattern A is used when spraying side to side (horizontal spraying)
B) Pattern B is used when spraying up and down (vertical spraying)
C) Pattern C is used for contouring and touch-ups.
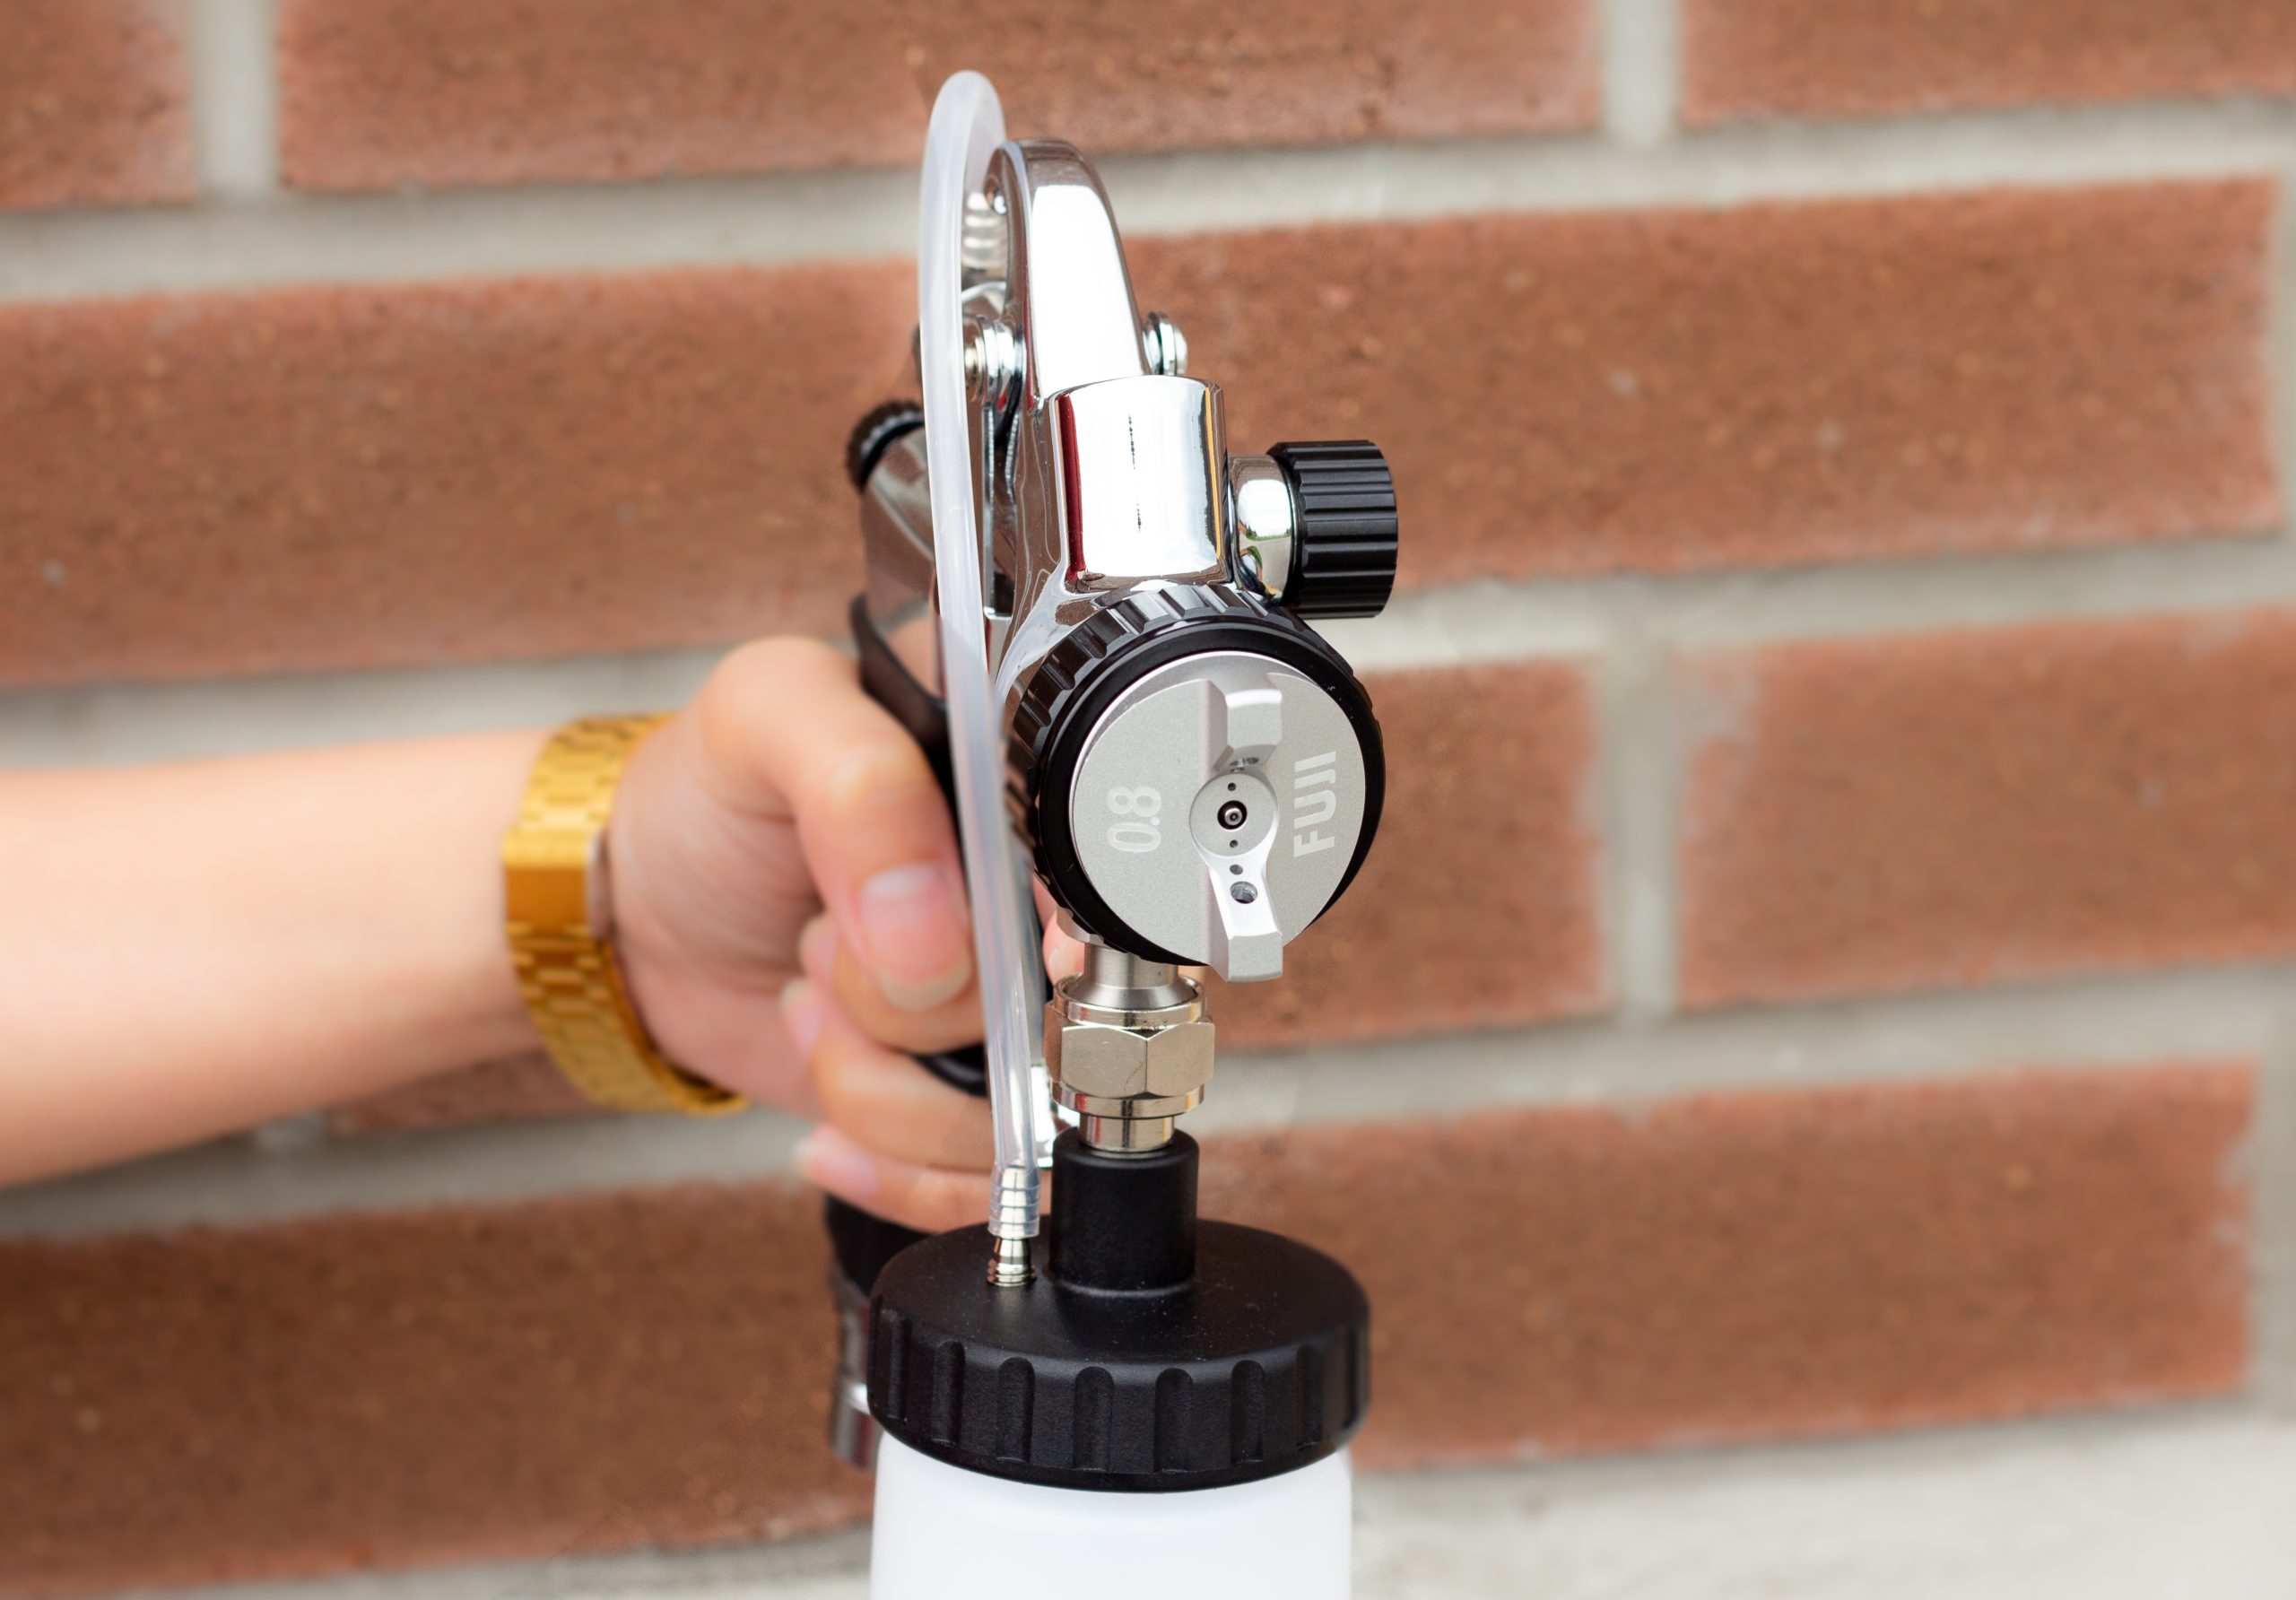
Now, adjust your nozzle depending on your spraying preference – it could be horizontally or vertically.
If you want to spray your clients in an up and down motion, you must set the nozzle to a horizontal 12 o ‘clock position so that your solution sprays in a horizontal fan (This is considered the simplest pattern shape for spray tanning).
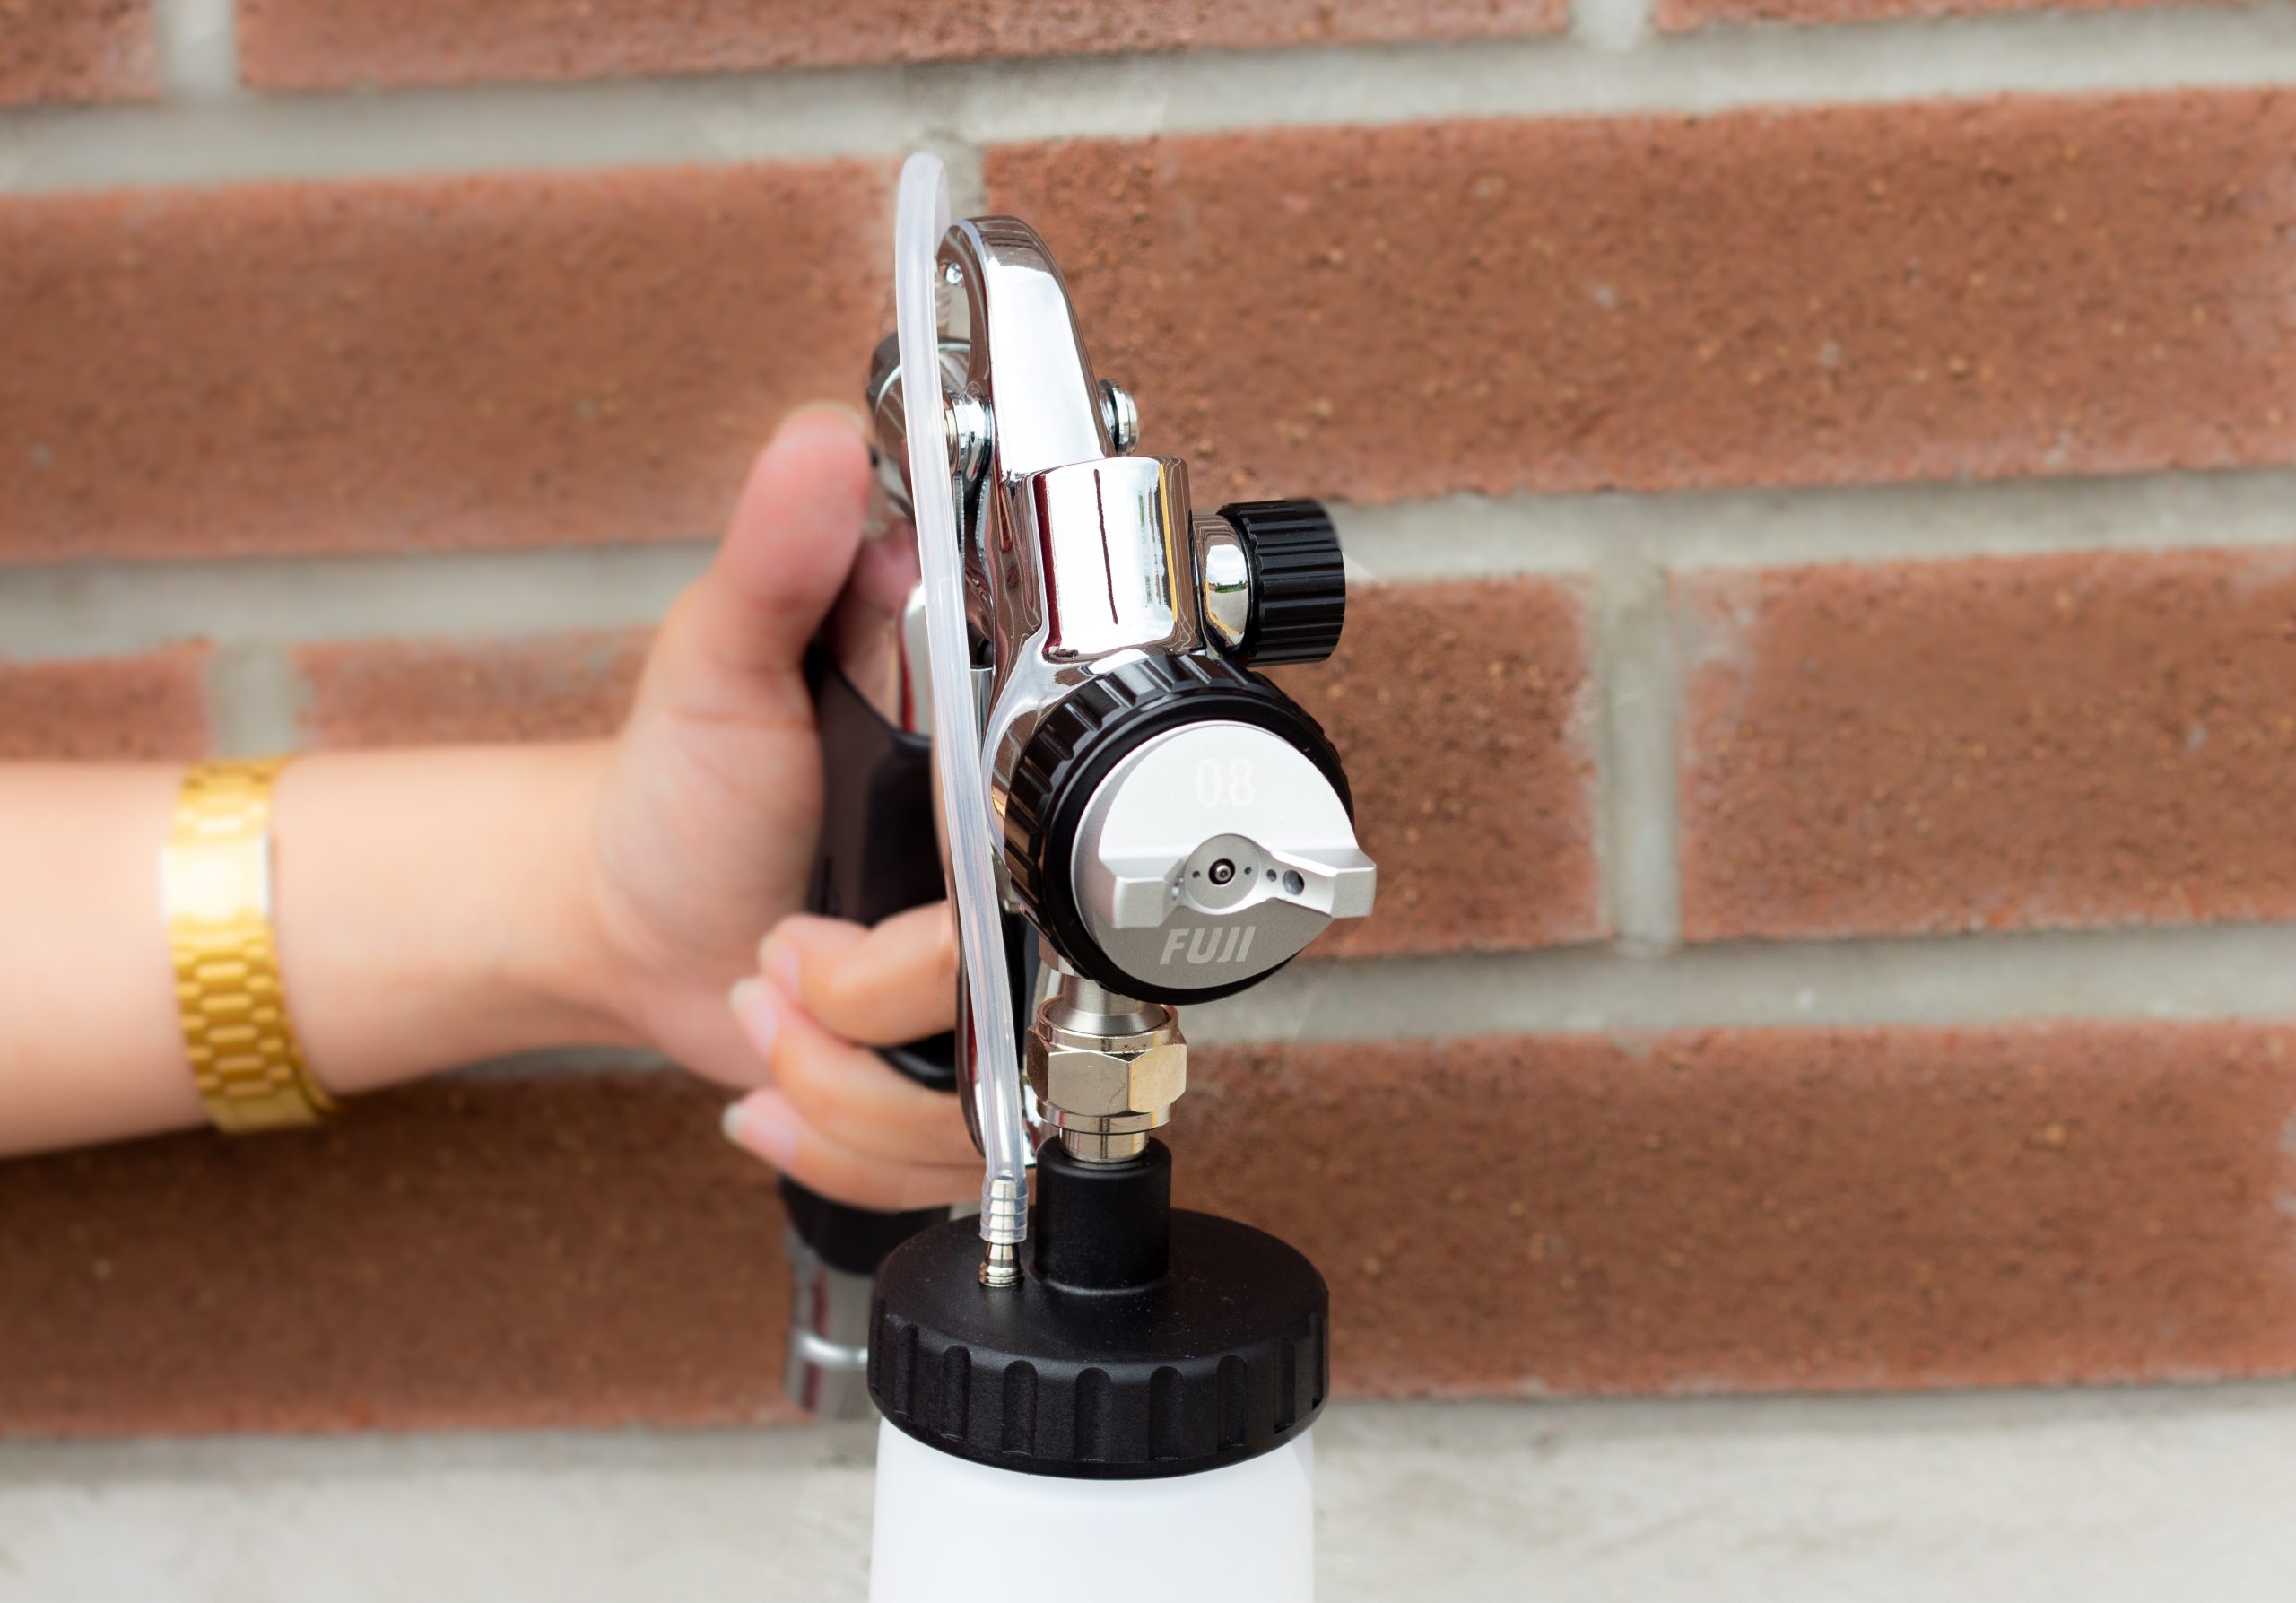
If you want to spray your clients in a side-to-side motion, you must set the nozzle to a 3 o’clock position as illustrated in the chart (Pattern A). Then, the solution will spray vertically.
PRO tip: If you turn the fan pattern to a round spray pattern, you will have to reduce the volume amount of tanning solution by turning the fluid knob.
You can use that pattern for touch ups in areas like bikini strap lines or to enhance certain areas such as abdominals and other muscular features.
STEP 2: ADJUST YOUR FAN PATTERN CONTROL KNOB
Now that you have set up your aircap to your personal preference, let’s adjust your pattern control knob. Your pattern control knob will determine how wide your fan pattern will spray for full body application and circle shape for contouring.
4200 T-PRO APPLICATOR
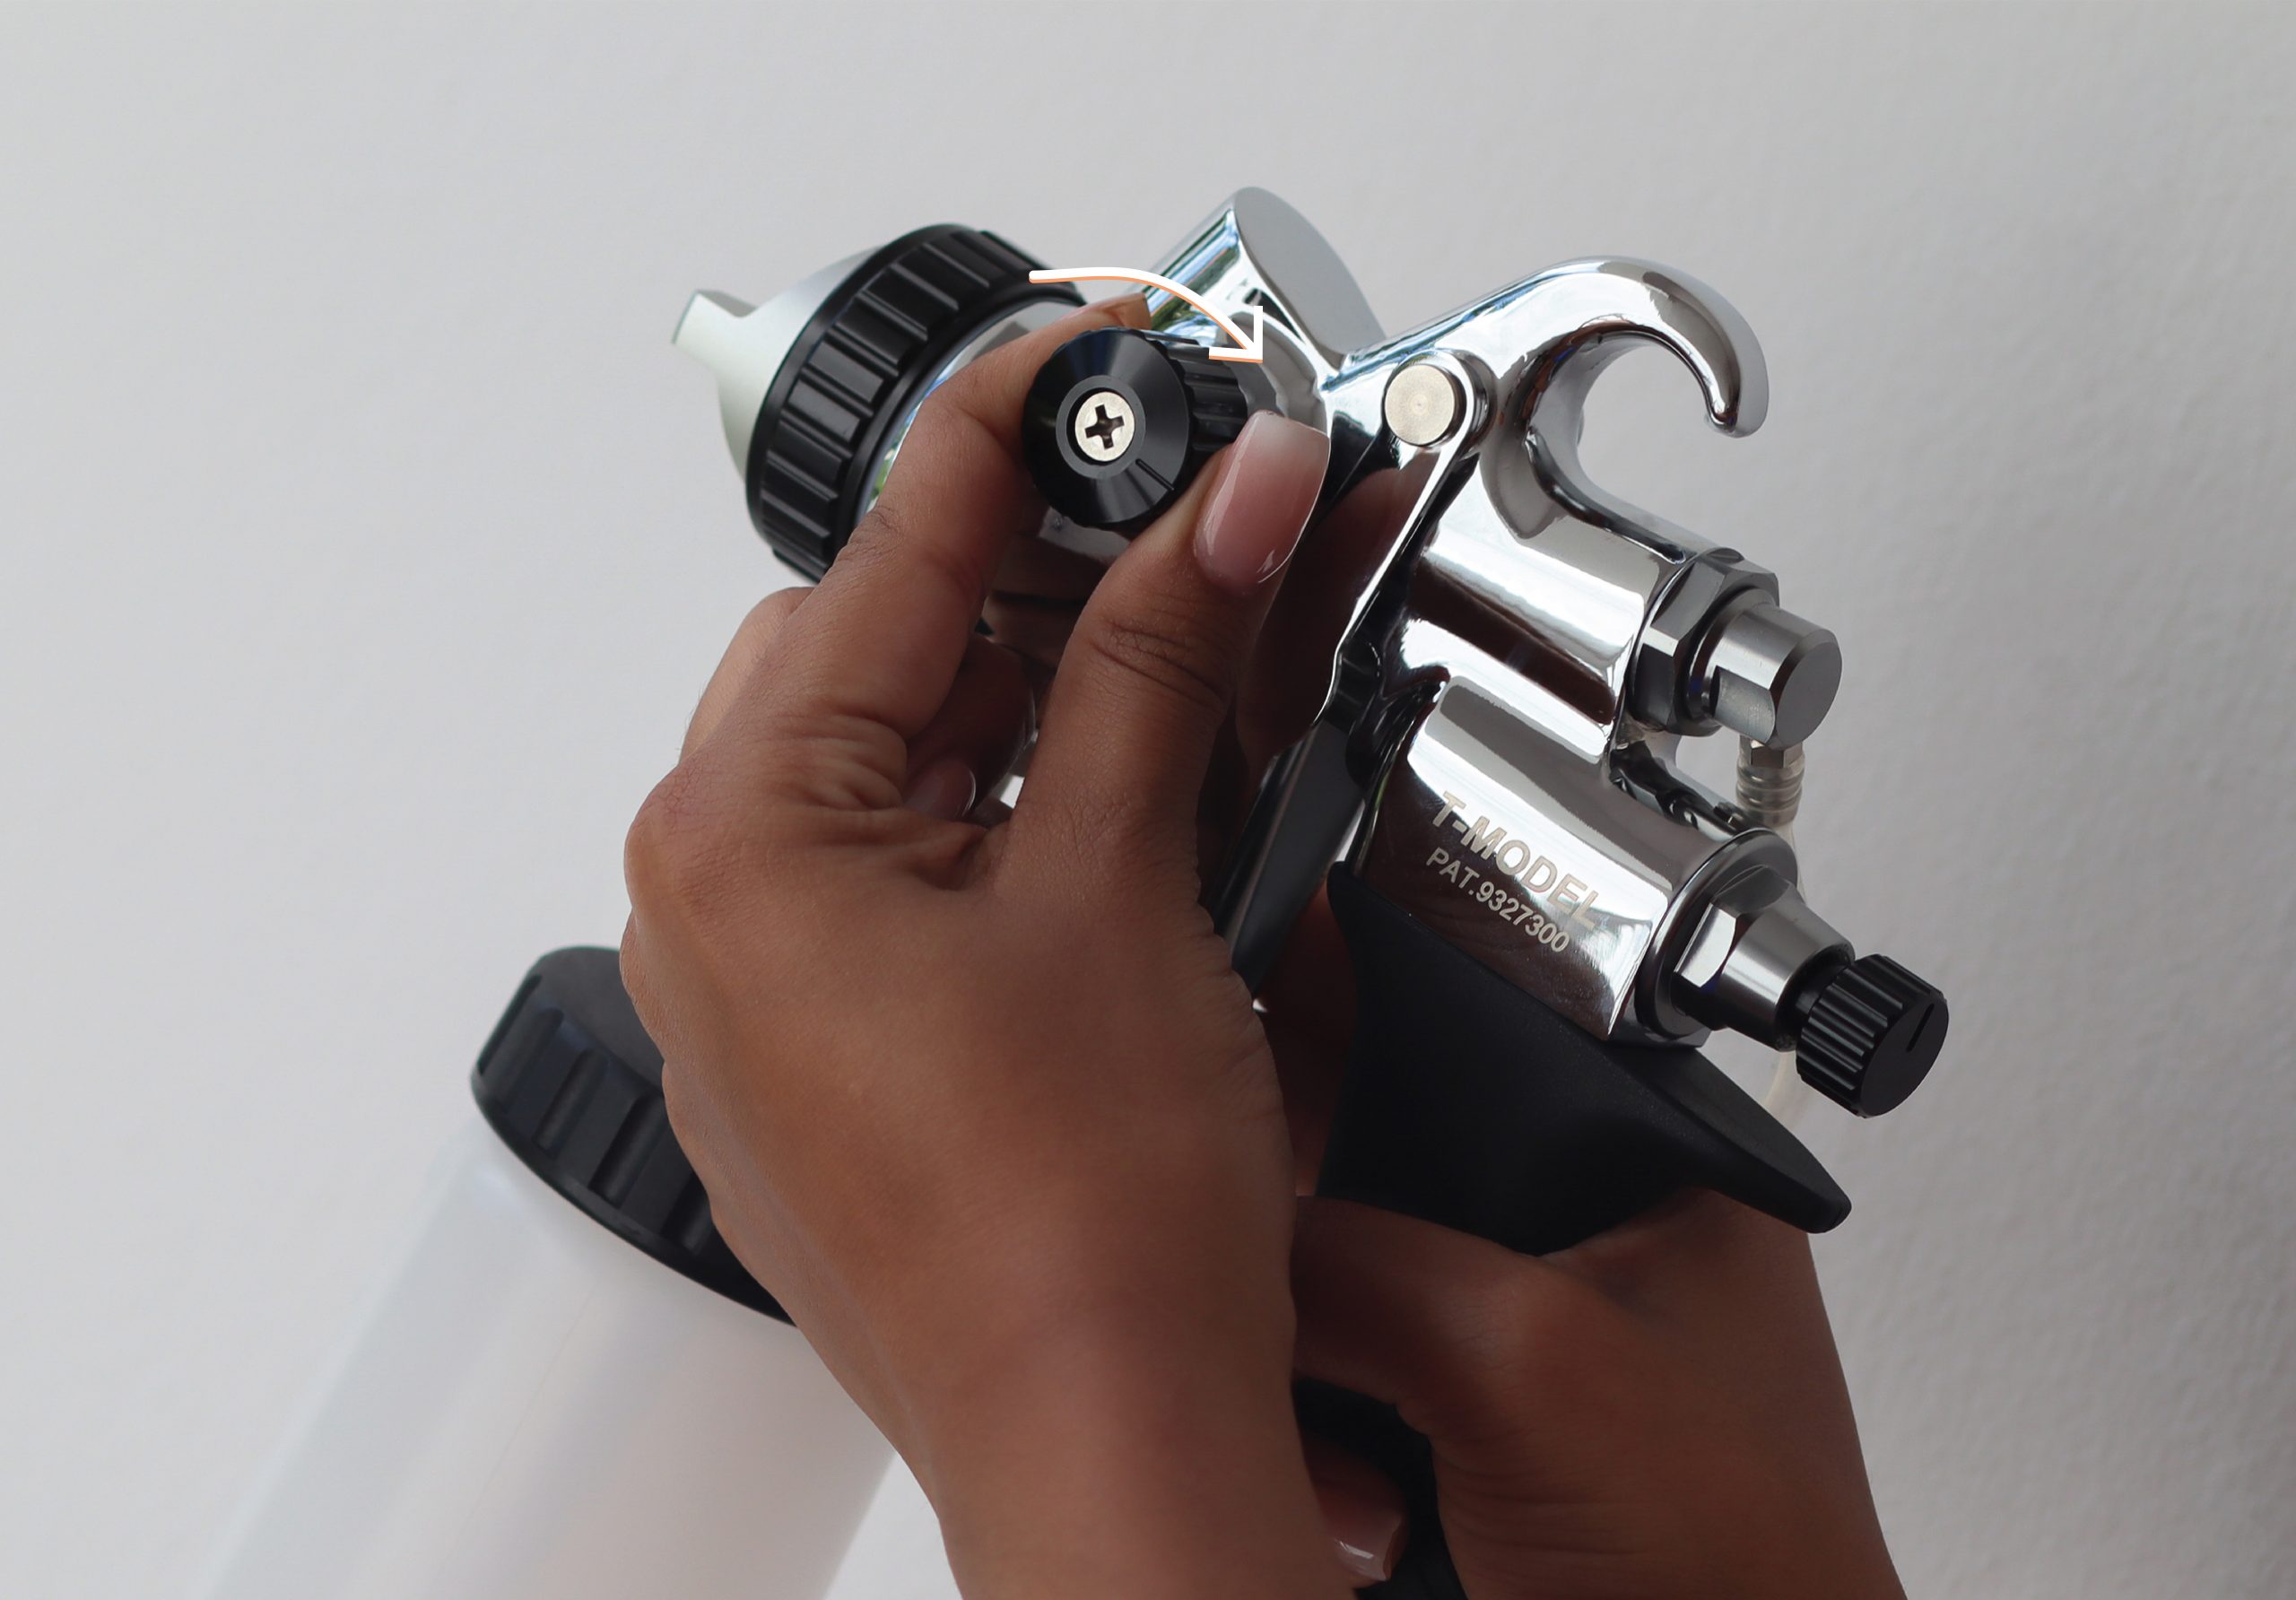
If you want to set up your fan pattern control to a wide fan pattern for full body application, rotate the fan pattern control knob backwards towards you.
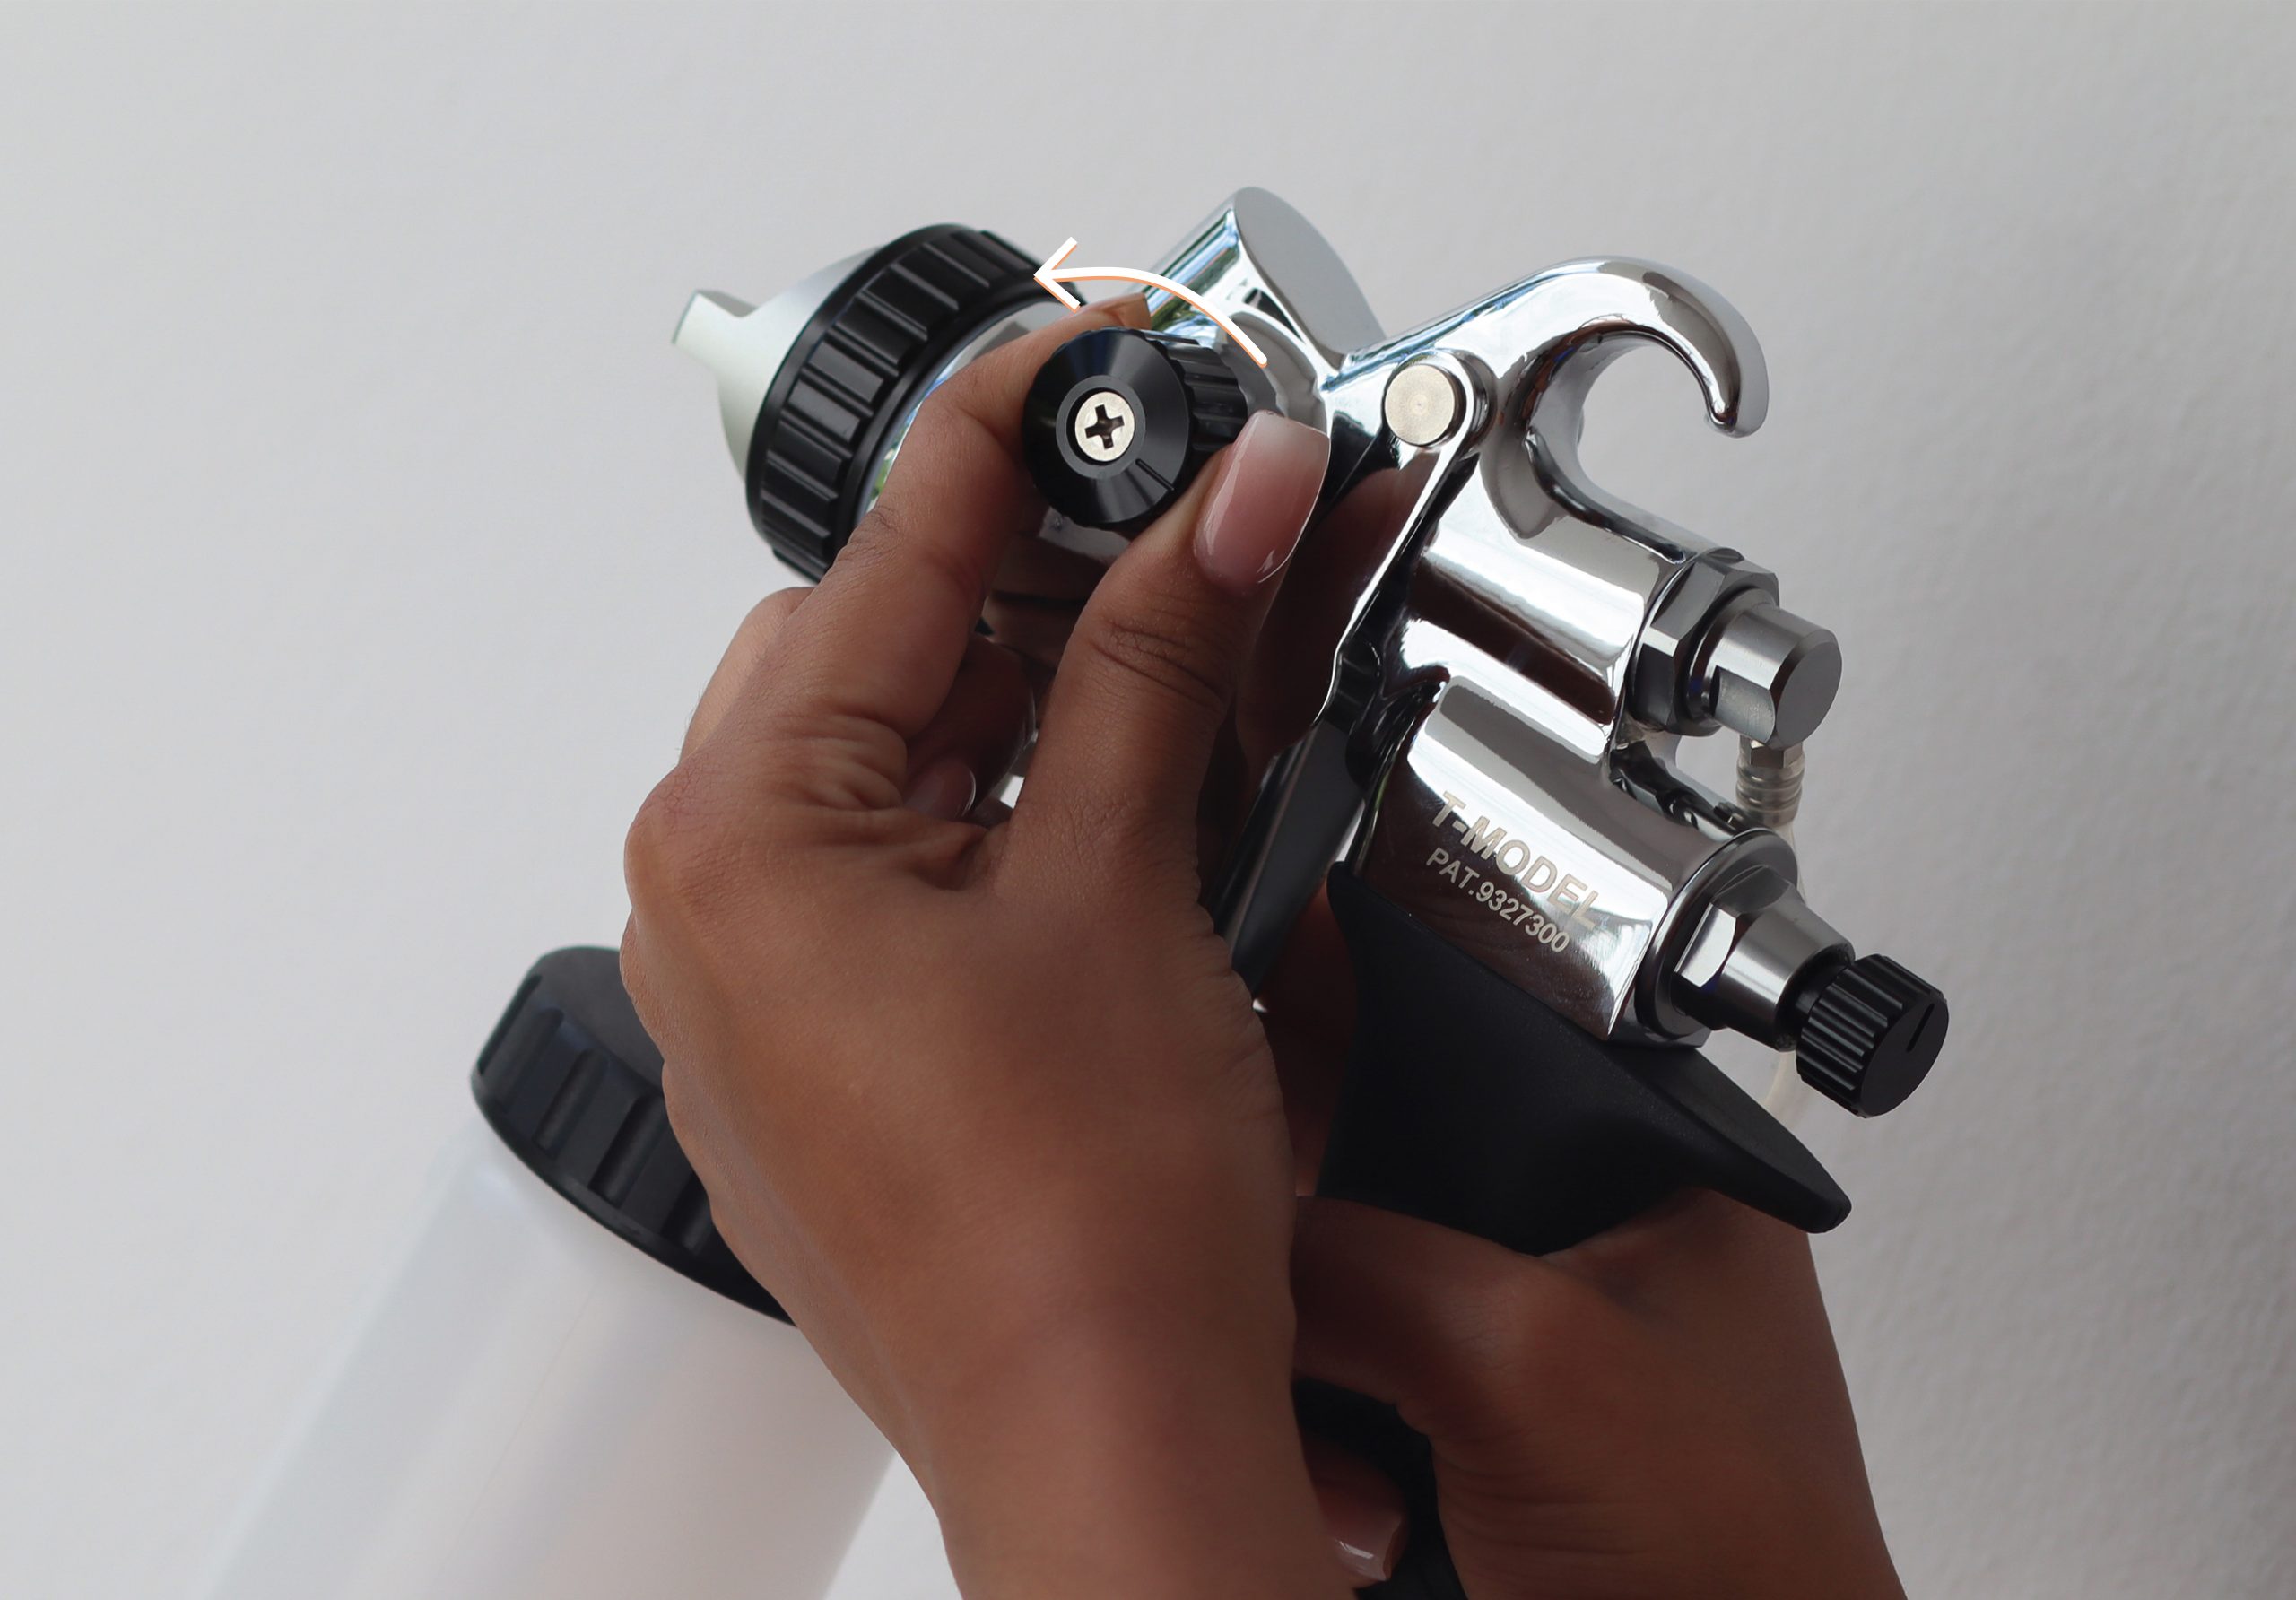
If you want to set up the fan pattern control to a circle shape for contouring, rotate the knob forwards – away from you.
7350 APPLICATOR
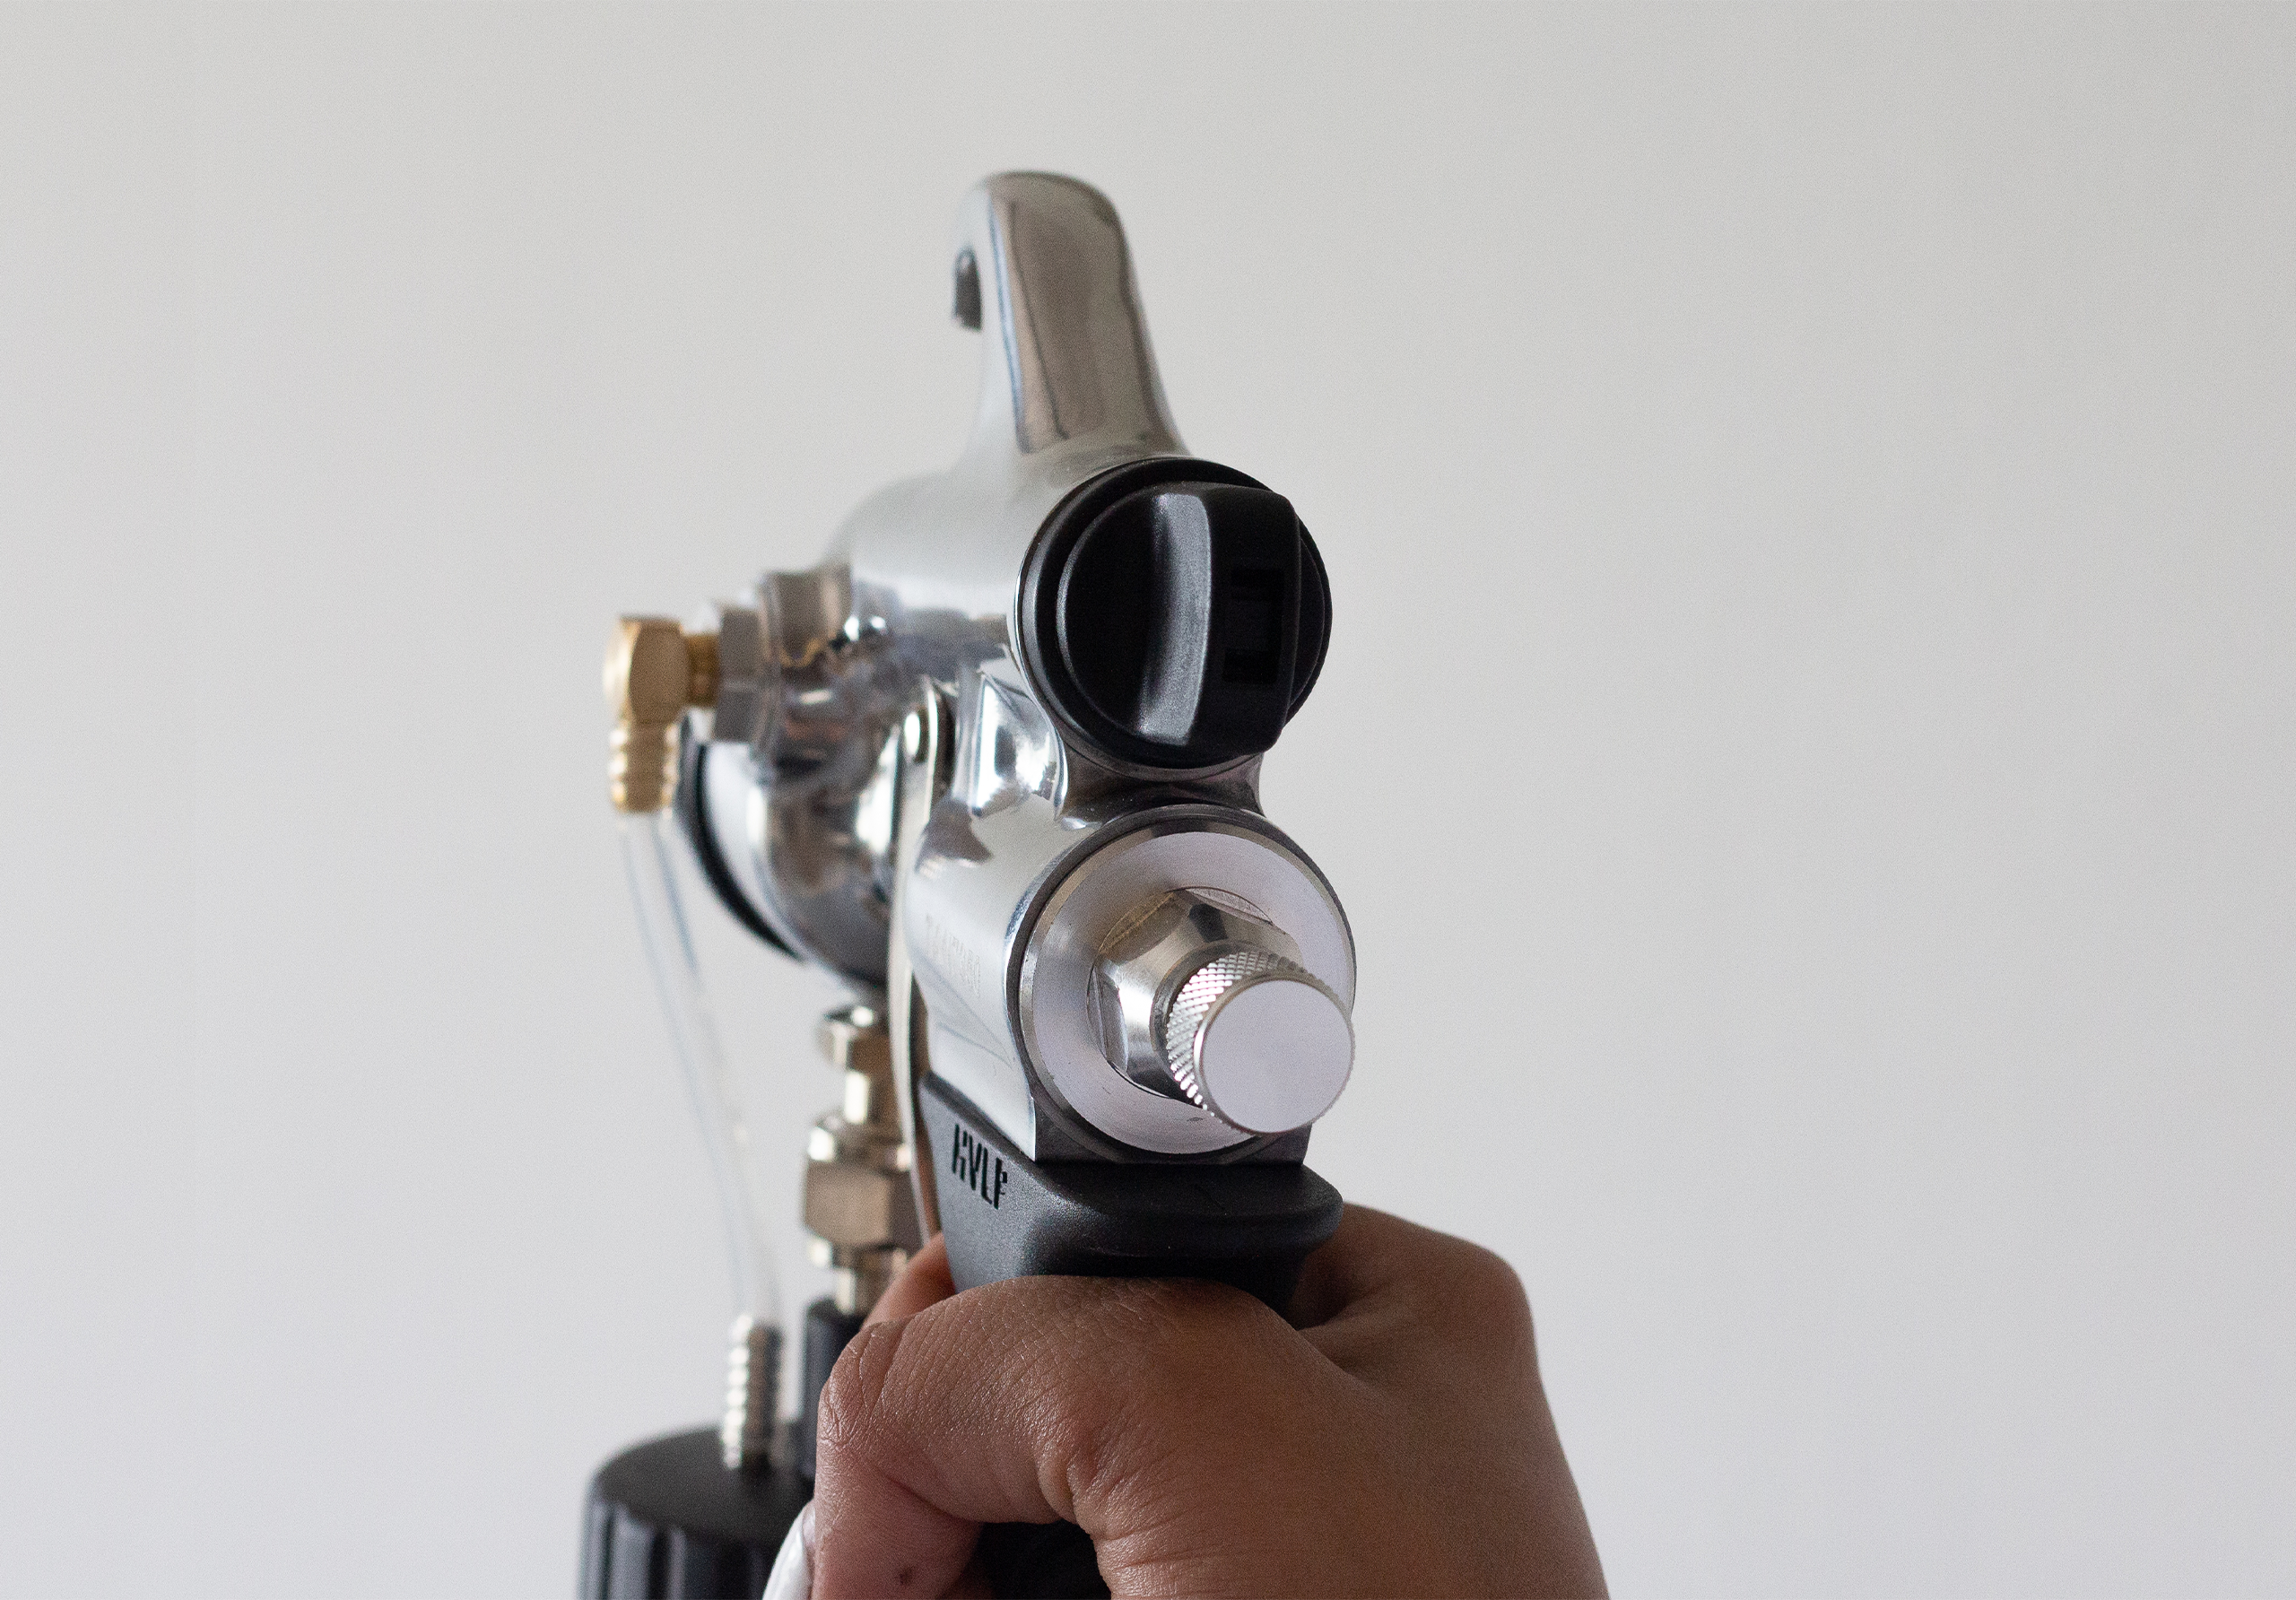
If you want to set up your fan pattern control to a wide fan pattern for full body application, rotate the black knob to the left.
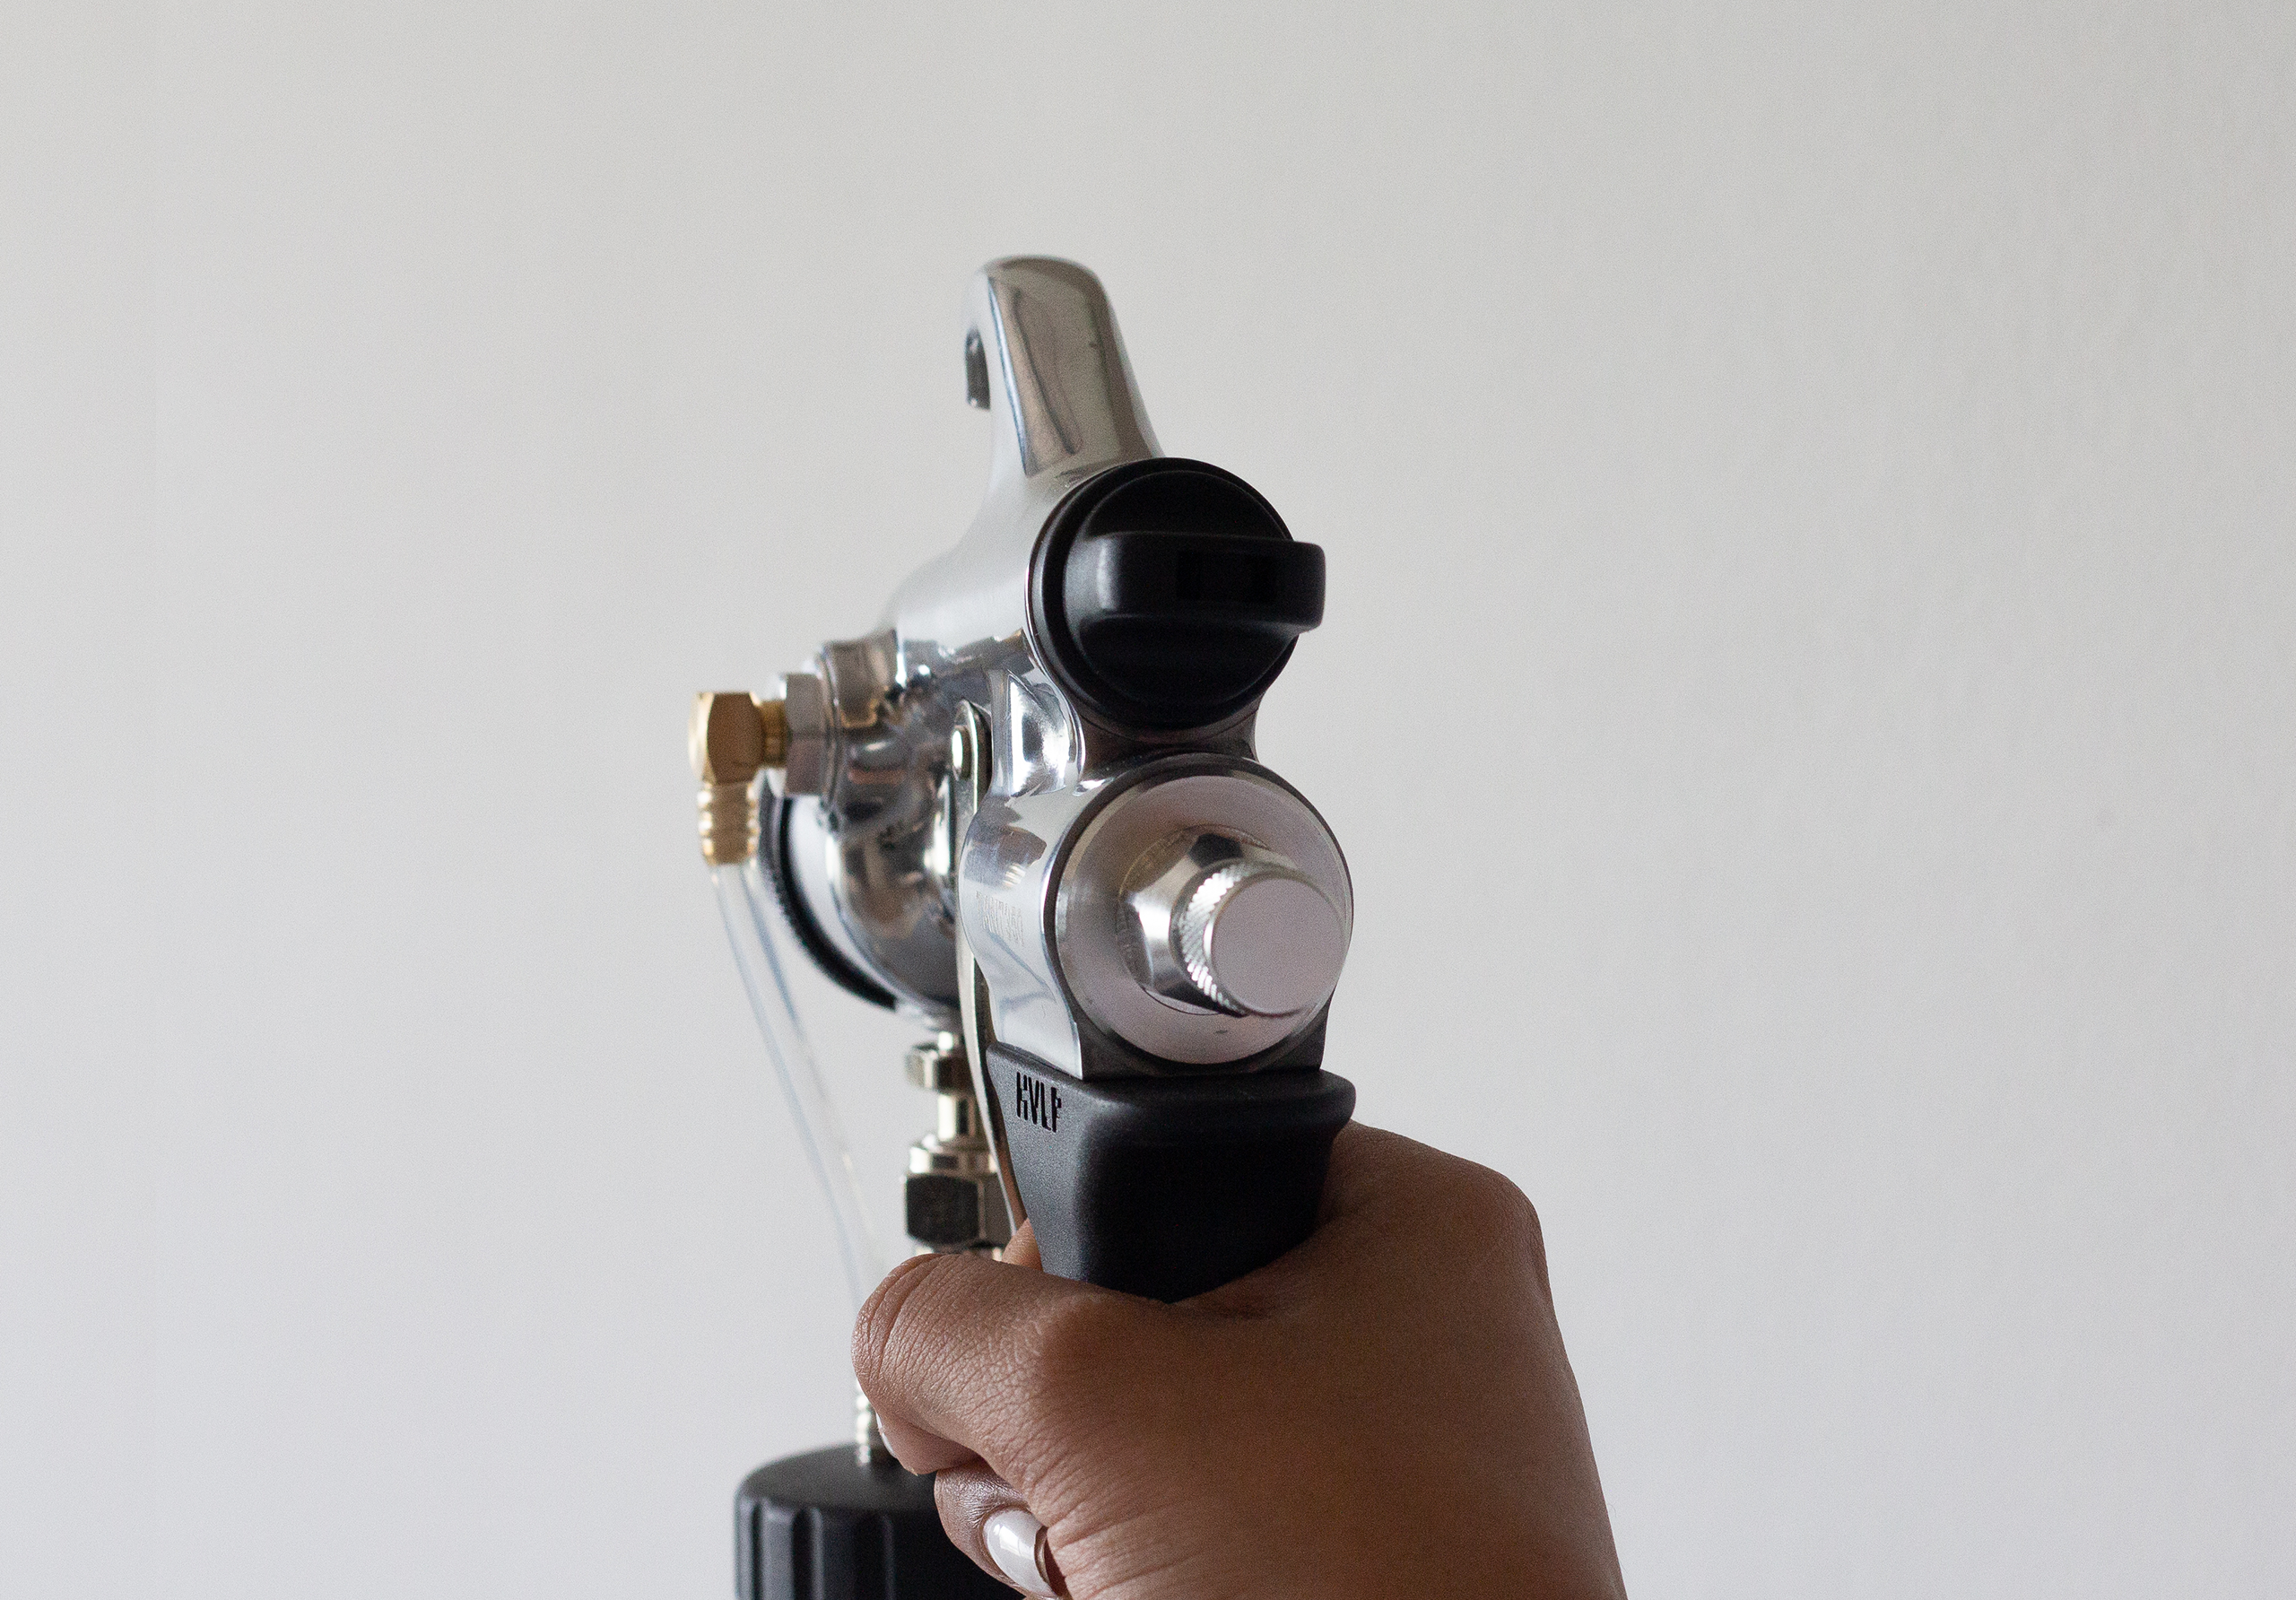
If you want to set up the fan pattern control to a circle shape for contouring, you need to twist the black knob to the opposite side – to the right, and adjust the volume of fluid coming out of your spray gun.
STEP 3: FLUID CONTROL KNOB
Adjusting the amount of solution coming out of your applicator is also important to ensure the best spraying results!
Your fluid control knob determines the amount of solution coming out of your applicator when pulling the trigger. It is important to note that your results and this setting will depend on the solution you use, distance, and speed.
7350 APPLICATOR
If you have a 7350 Applicator, your fluid control knob will be the small silver knob located at the back of your gun. If you turn the fluid control knob to the right, less solution will be released. If you slowly turn the fluid control to the left, more solution will be released.
4200 APPLICATOR
If you have a 4200 Applicator, your fluid control knob will be the small black knob located at the back of your gun. If you turn the fluid control knob to the right, less solution will be released. If you slowly turn the fluid control to the left, more solution will be released.
If you are just getting started and not sure which setting you prefer, start by fully closing your fluid control by turning it all the way to the right. No solution will come out when your fluid control is fully closed. Then, slowly begin turning your fluid control knob to the left and test it out as more solution comes out!
I usually like to spray a little bit of solution inside of the tanning tent to see how much solution is coming out before spraying it onto a client’s body. Based on that test, you can adjust the fluid control knob to your liking and needs!
STEP 4: SPRAYING TECHNIQUES & TIPS
Lastly, now that your spray gun settings are all set, its important to consider distance and duration while spray tanning. Keep your distance and speed the same throughout the spray tan session, in order to spray the body evenly. Ensure to move the applicator at a medium, steady speed keeping the distance of the applicator the same throughout the spray application for best results!
And that’s it! That covers our blog on spraying patterns! If you need further help with spray gun settings, contact us via email at support@fujispray.com, or by phone at 1-800-650-0930.


